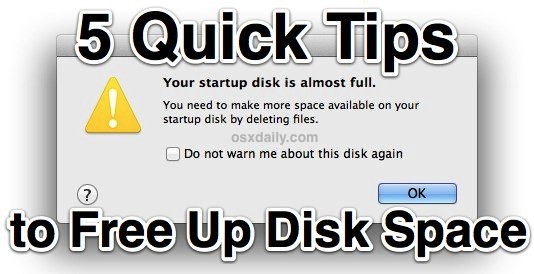
Mac running out of disk space? If you’ve ever received that dreaded “disk full” message when using a Mac, you know it can be pretty frustrating to try and free up disk space quickly so you can get back to work. But it’s actually not too hard, and there are a few quick and easy tips to quickly free up space so you can get back to work in no time, and begone with the “Your startup disk is almost full. You need to make more space available on your startup disk by deleting files.” error.
1: Quit & Relaunch Apps
Apps like Safari, Chrome, Firefox, Photoshop, Spotify, and many others, create temporary cache files while they’re in use. If you haven’t quit these apps in a long time, those cache files continue to grow, and generally they aren’t cleared out until the app is quit. You can also delete the cache files manually, but it’s much easier to just relaunch your apps and have the OS clear it for you. It’s a good idea to relaunch apps from time to time for this reason, particularly web browsers.
2: Tackle the Downloads Directory
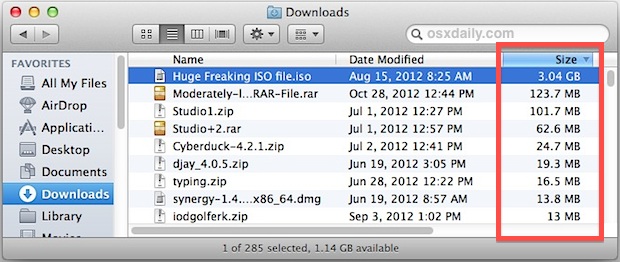
The user downloads folder is notorious for growing gigantic when left unchecked for a while, and it’s often the easiest pickings. Jump to your ~/Downloads directory and sort by file size, then delete anything (everything) you don’t need any more.

A good future habit to help manage the downloads directory is this: once you install an app, delete the installer .DMG file, zip file, or archive it came from.
3: Reboot the Mac & Install System Updates
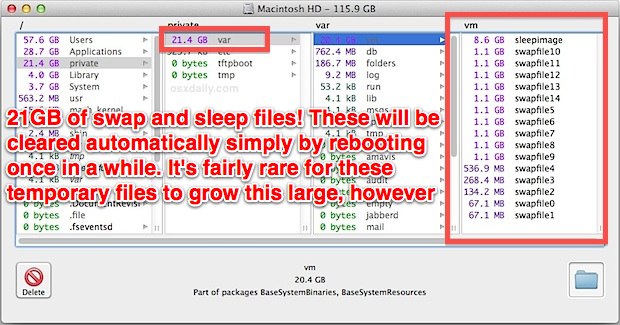
Though we rarely reboot our Macs around here, rebooting a Mac will almost always free up a fair amount of disk space, simply because it flushes system caches, some app caches, installs system updates, and perhaps more significantly, the virtual memory swap files and sleep image files. The latter two can grow quite large if you rarely reboot a Mac. Swap files are basically things that are no longer active in memory and then swapped to storage on disk, and the sleepimage file is basically a duplication of what’s in current memory so it can be retrieved when a Mac is woken from sleep. Both of these files will be cleared when a Mac is rebooted, in the example below these two temporary files accounted for 21GB of disk space alone, though this was on a Mac that hadn’t been rebooted in five months.

It’s a good idea to reboot a Mac with some regularity, even if it’s only once a month or so to install the OS X system updates that come out periodically. Speaking of System Updates, if you’ve downloaded them but haven’t installed them yet, they’re just sitting around taking up disk space on your Mac. That can easily end up taking up a couple gigabytes for major system updates, and rebooting will take care of that wasted space and also install the update.
4: Use OmniDiskSweeper to Find Hidden Space Hogs
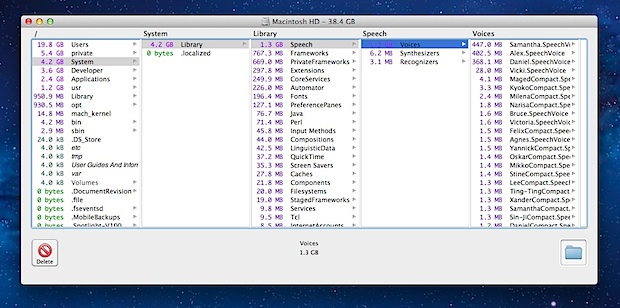
OmniDiskSweeper is an excellent free utility that will scan your hard drive and list all directories by size, making it extremely easy to quickly determine what is taking up space and where. Use this to identify space hogs after you’ve targeted the easy suspects, like the downloads folder. This is generally better for advanced users, and you should never delete a file you’re uncertain of it’s purpose, and certainly never delete any system files or you may mess up the Mac.
We’ve discussed the free OmniDiskSweeper tool in the past as a great way to recover disk space, and there’s no better time to use it then when you get the dreaded “disk full” warning.

5: Empty the Trash
Sounds obvious, right? It is, but it’s also pretty easy to forget to empty the Trash and let it grow and grow, and sometimes a hard drive can be running out of space simply because a bunch of stuff was moved to the Trash but it wasn’t actually emptied. If you’ve somehow never done this before, right-click on the Trash and choose “Empty Trash”.
Bonus 1: Gamer? Check the Application Support Folder
The user Application Support folder is also worth checking, particularly if you have Steam installed and play games, or once played games. Steam keeps a lot of files in ~/Library/Application Support/Steam/ and if you have a lot of Steam games installed, they can grow quick. Once you stop playing a game, it might be worthwhile to clean up that folder. If you’re on a Mac with a smaller hard drive, it might even make sense to move the Steam folder onto another drive.
Bonus 2: Turn the Finder Status Bar On
Enabling the Finder status bar lets you keep an eye on available disk space, so you won’t be surprised by that error message in the future. This is very easy to do:
- From the OS X Finder, pull down the “View” menu and select “Show Status Bar”
![]()
Anytime you head under about 5-10% of your maximum drive capacity, you should start doing some housekeeping. Macs (and all computers in general) run best when there is adequate free space available for cache files and swap disk, so always aim to have some free space available.
Bonus 3: Delete Apps You Don’t Use
Another great way to free up disk space is to uninstall any Mac applications you no longer use. Generally, this is as easy as going to the /Applications/ folder and removing apps you just don’t need anymore, or you can even delete from Launchpad the apps that have come from the App Store, much like you do in iOS. If you want a more thorough approach to completely delete an app and anything related to it, free third party tools like AppCleaner are what you’re looking for.
Have any good tips to free up disk space on a Mac? Let us know in the comments!
via http://osxdaily.com/2012/11/11/tips-free-up-disk-space-mac-os-x/?utm_source=feedburner&utm_medium=feed&utm_campaign=Feed%3A+osxdaily+%28OS+X+Daily%29


